Introduction -
As you build your applications and severs in Amazon and
other cloud services it is critical to patch those servers on a regular basis
to guard them from vulnerability and security incidents. Securing these servers
from attacks are very tedious tasks and involves fleet of people or an
application that needs to be maintained and managed by a group of IT engineers
to keep the servers patched. To address this problem Globalsolutions
runs a hosted (SAAS) patching solutions for as low as 99 cents to patch an EC2
instance running in AWS cloud.
Key terms and definition of certain actions -
SAAS
Console – This is the main console which enables you
to create user, add aws accounts, patch servers etc.
Once configured with the required amazon credential it will pull the server
under the configured account. From the list of your servers you select the ones
you want to patch in one click.
AWS
Account ID – Your AWS account which you can get it by
logging into AWS console -> Account
External
ID - A unique identifier that is used by third parties when
assuming roles in their customers' accounts
Global
User Name – This will be your common Admin user for all
of your EC2 instances. If you don’t have one please go ahead and create a
common user account which will have admin level privileges.
Global
Password – This will be the password for the Global
Admin user
Refresh – ![]() - Will refresh the home screen
- Will refresh the home screen
Reload - ![]() - Will refresh to the current state(running/stopped/terminated) of EC2 instances.
- Will refresh to the current state(running/stopped/terminated) of EC2 instances.
IAM
Roles – Roles that are created in AWX IAM
REQUIREMENTS
·
Need
to create a role called “windowspatching”. It is
mandatory to create the role using the below steps which will help our service
to describe your EC2 instances.
Steps to CREATE
ROLE
·
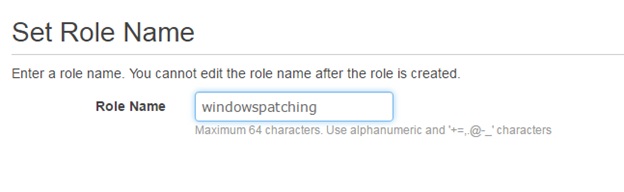
Step
1 - Create a role by the
name "windowspatching".
·
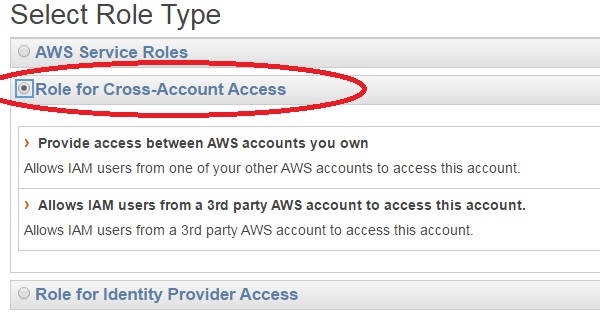
Step
2 - Select the Role type
as "Role for Cross-Account Access" and go for "Allows IAM Users
from a 3rd party AWS account to access this account".
·
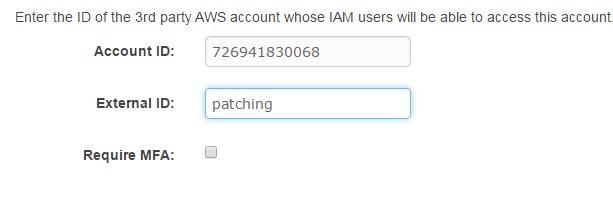
Step
3 - Enter the following
account ID as it is and specify your external ID. Please specify your external
ID. It should not be "patching" as specified below.
Note - you will be providing this external ID while
signing into our patch console
·
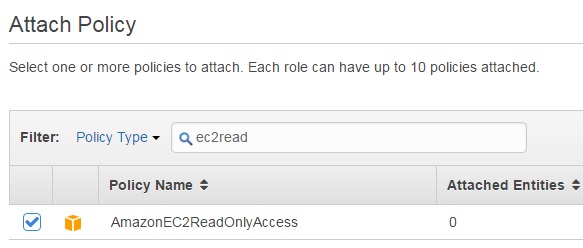
Step
4 - Assign EC2 read only
access policy.
·
Step5
- Review and complete
the creation of the policy.
While configuring the Global Solutions patch console you will be requested to
enter your account ID and external ID as shown in the below example which will
enable us to describe your ec2 instances.
·
The servers that needs to be patched should
have the following ports opened in their security group
o
Protocol – TCP, Port – 9090
o
Protocol – TCP, Port – 445
o
Protocol – TCP , port – 135
·
Downloading the agent –
o
The agent is uploaded to our S3 bucket, it can
be downloaded from the following link https://s3.amazonaws.com/patchclient/patchclient.exe
o
You can install the agent in your golden AMI
and distribute in all your EC2 instances or you can use your configuration
management tool to push the agent to all end points. If you use AD you can add
the agent to your group policy.
o
The agent can be installed by double clicking
on the exe and follow the steps. You can also install the agent silently with
the following command
§ C:\gs\patchclient.exe
/verysilent
§ In the
above command replace “c:\gs” with the path where you
have downloaded the patchclient.exe.
o
If you want to use our console to push the
agent to your EC2 instances then we would need you instance Administrator’s
user name and password in the configuration page.
Steps to add your
servers/EC2 instances to SAAS CONSOLE SERVER for patching -
·
Go to https://patchawscloud.com/saasconsole
·
Click the login tab in the top right corner of
the page
o
Register your company name, username(email ID)
and password to create a Globalsolutions account
o
Once successfully registered use the same username(emai lD)
and password under MEMBER LOGIN to login in to the GS SAAS server.
·
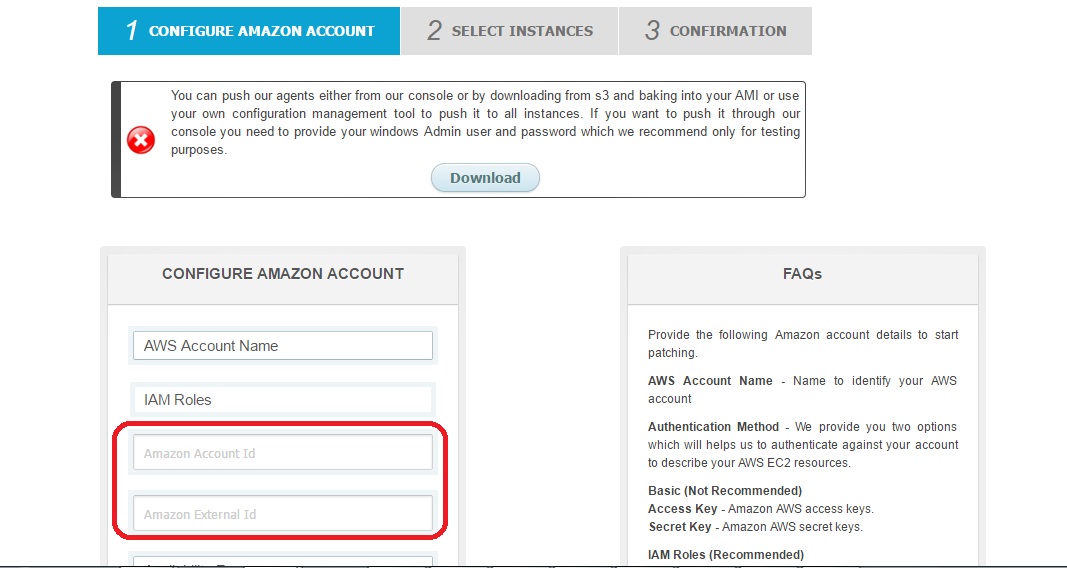
Once logged in to the console for the first
time you will be prompted to provide the AWS related information to start
patching your servers.
o
You can have multiple AWS accounts paired to
one Globalsoluions account created in the previous
step.
o
There is a FAQ in the right side detailing
every field.
o
Provide the AWS account name, select the
authentication method as IAM role.
§ You
will see two fields “AWS account ID" and “External ID”
·
Your Account ID can be found from AWS console
-> Account information.
·
External ID is the ID that you entered while
creating the role “windowspatching” in the steps
mentioned above.
§ Enter
the region and click continue. You are all set, all of your EC2 instances will
be populated
·
Below is the snapshot of the initial configuration
page-

·
Once you fill up the above information hit
continue and you will be able to see the list EC2 instances in your account (as
shown below).

·
Select the instances you want to patch and hit
the patching button
Steps to patch your
Server/EC2 instance
·
You can do a bulk patching or patch the
machines individually
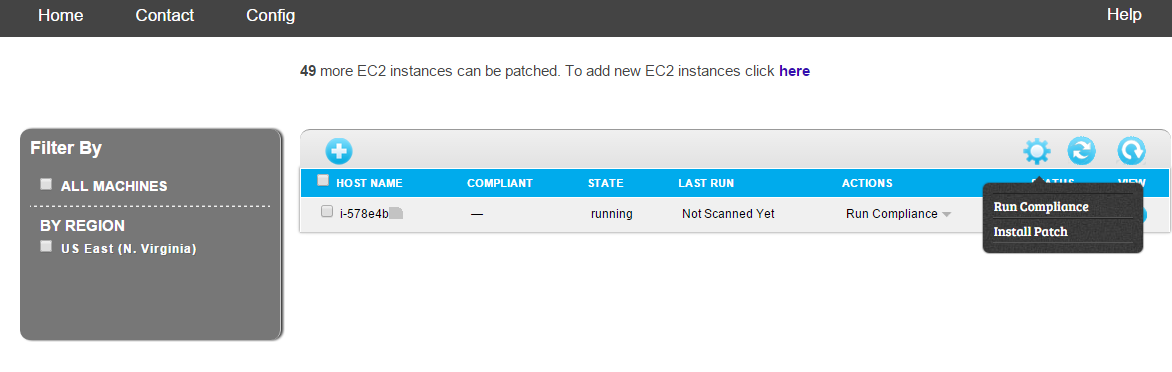
·
To do bulk patching select the servers that you
want to patch and run the “Run Compliance” or “Install patch” as show below
·
To run
compliance for a single server you can got to the ACTIONS column for a specific
server and run the compliance.
·
The first step in patching is to run
compliance. Running the compliance against the servers will provide you if the
servers ( EC2 instances) are in compliant with all the
required patches.
o
You cannot install patches without running
compliance
·
Once the compliance is run you will see the
missing patches under the “COMPLIANT” column.
o
As you run the compliance you can see the
following status under the “STATUS” column ,Checking for Agent, Downloading Agent, Patch scan initiated, Idle
§ Once
you see the status as idle your compliance scan is completed.
§ Refresh
![]() the screen, you will see the number of patches
missing in the compliant column.
the screen, you will see the number of patches
missing in the compliant column.
·
Currently there is a known bug which requires
you to refresh the screen the first time after the patch scan completes.
·
This action is required only during the first
run, subsequent runs will not need this manual refresh
·
The next step is patch the missing patches. You
can either patch a single server or select a specific patch to be installed on
multiple servers.
·
To install patch on a single server go to
“Actions” and select Install patch.
o
This will bring you the list of patches. Select
the patches that you want to deploy and hit install.
·
If you want to do a bulk install hit the wheel
like icon ![]() and select “Install patch”
and select “Install patch”
o
The above will pop up a window with all the
missing patches and number of servers/EC2 instances the patches are missing.
o
Select the patch and it will show you the list
of server.
o
Select the servers you want to install patch
and hit install -> close.
·
YOU WILL BE ABLE TO SEE THE STATUS OF THE
PATCHES IN STATUS COLUMN.
o
The status
is updated every 30 seconds
For
questions/support you can send an email to support@theglobalsolutions.net